
How to Adjust the Print Size on Your Printer
Have you ever wanted to shrink or enlarge the size of a document you are printing?
Here’s an easy step-by-step tutorial that walks you how through how to adjust the print size of documents on your printer.
The trick is to change the page size setting after you select “print.”
For example, my word wall toppers come two per single sheet of 8.5 x 11 inch copy paper.
Users often request smaller or larger versions of the word wall toppers depending on the space they have available in their classroom.
You can quickly and easily and change the print size to meet your needs when you go to print your document.
Here’s how to change the print size on your printer:
Step 1: Click CTRL-P on a PC (or COMMAND-P on a MAC).
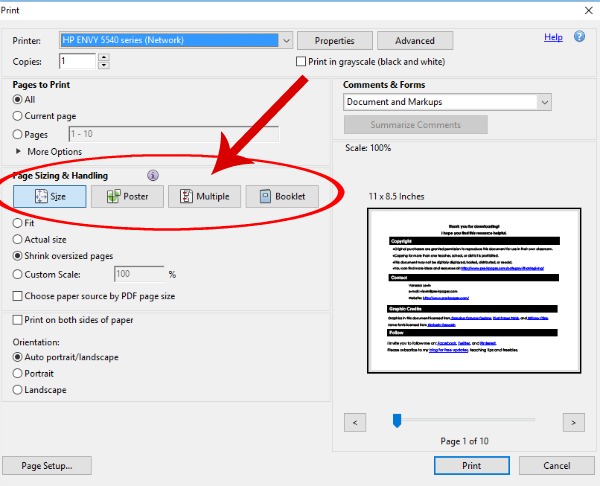
Step 2: When the printer dialog box pops up, look for text that says “Page Sizing & Handling”.
Step 3: You should have 4 options to choose from: Size, Poster, Multiple, and Booklet – select “Multiple”.
Step 4: Under “pages per sheet”, select the number you want, depending on the size you want your toppers to be. To print 4 toppers per page, select “2” pages per sheet. You can select 4 for smaller toppers, or 6 or 9 etc. The higher the number, the smaller the toppers will print because you will have more on each page.
The little preview window on the right side of your printer dialog box will show you how your pages will look when printed.
